Configuración de Pegasus 4.2
-
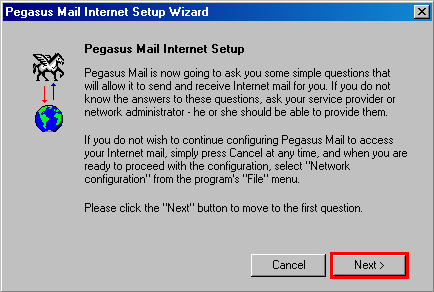
Abra el correo Pegasus 4.2.
-
Presione el botón "Next".
-
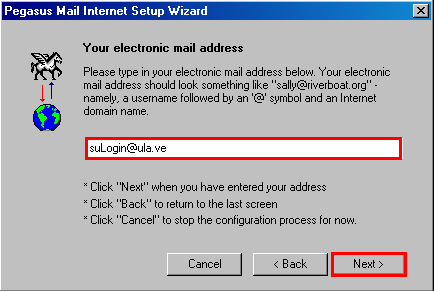
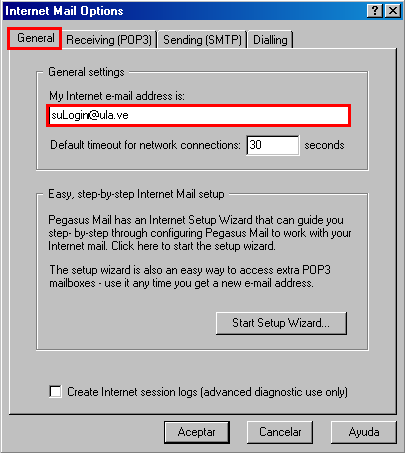
Introduzca su Dirección de Correo siguiendo el formato suLogin@ula.ve, sustituyendo suLogin por el login que se le asignó.
-
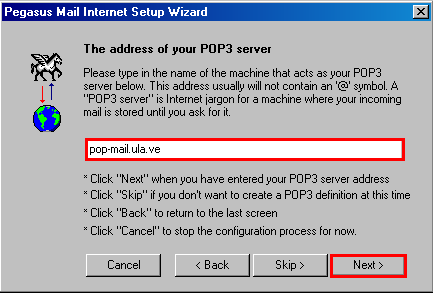
Introduzca pop-mail.ula.ve, por favor no use mailhost.ula.ve; presione el botón "Next".
-
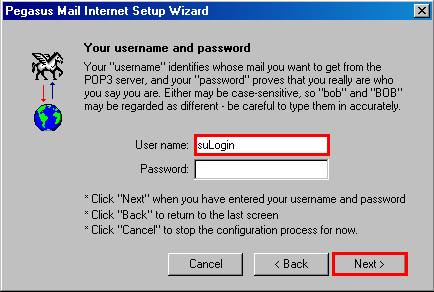
Introduzca el login que se le asignó, en el campo "User Name"; presione el botón "Next".
 .
.
-
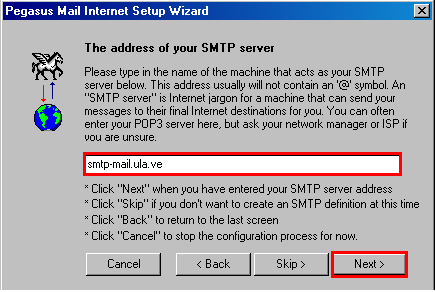
Introduzca smtp-mail.ula.ve, por favor no use mailhost.ula.ve; presione el botón "Next.
-
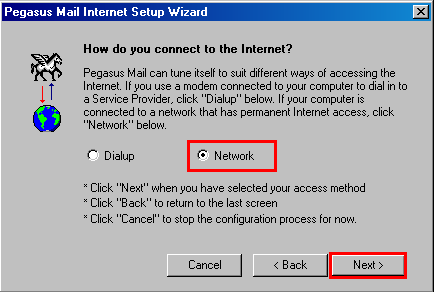
Seleccione "Dialup" si esta en una conexión telefónica, de lo contrario, seleccione "Network"; presione el botón "Next".
-
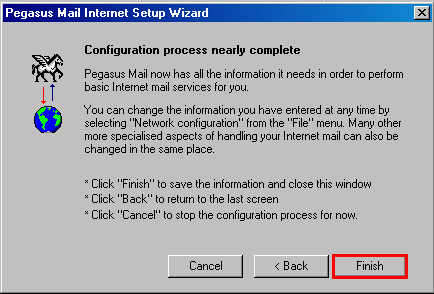
Presione el botón "Finish".
-
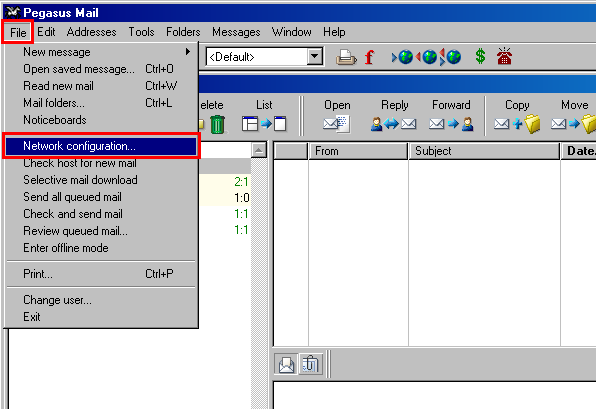
En el menú "File" seleccione "Network Configuration...".
-
Seleccione la pestaña "General"; verifique su Dirección de Correo.
-
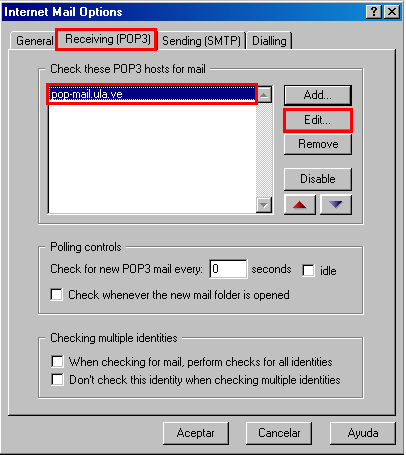
En la pestaña "Receiving(POP3)".
-
Seleccione la cuenta de correo.
-
Presione el botón "Edit..".
-
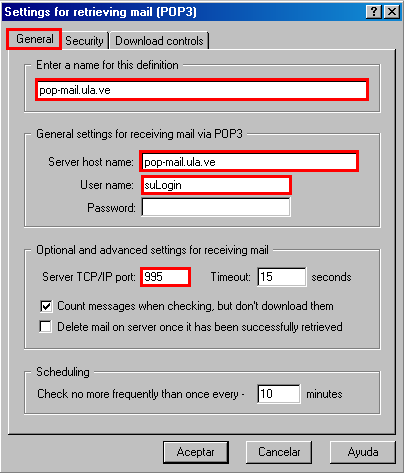
En la ventana "Setting for receiving mail(POP3)".
-
Seleccione la pestaña "General".
-
En el campo "Enter a name for this definitions" introduzca un nombre, por ejemplo "pop-mail.ula.ve".
-
Introduzca "pop-mail.ula.ve" en el campo "Server host name".
-
Introduzca el login que se le asignó en el campo "User Name".
-
Verifique que el valor "995" esté en el campo "Server TCP/IP port:".
-
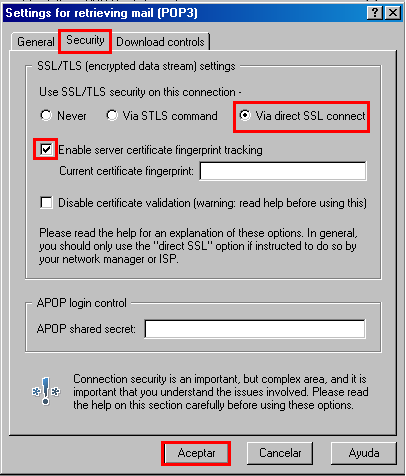
En la ventana "Settings for retrieving mail (POP3)".
-
Seleccione la pestaña "Security".
-
Active la opción "Via direct SSL connect"
-
Verifique que "Enable server certificate fingerprint tracking" esté activado.
-
Presione "Aceptar".
-
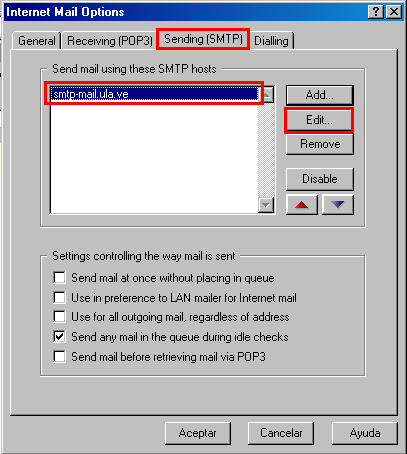
En la pestaña "Sending (SMTP)".
-
Seleccione la cuenta de correo.
-
Presione el botón "Edit..".
-
En la ventana "Settings for sending mail (SMTP)".
-
Seleccione la pestaña "General".
-
En el campo "Enter a name for this definitions" introduzca un nombre, por ejemplo "smtp-mail.ula.ve".
-
Introduzca "smtp-mail.ula.ve" en el campo "Server host name".
-
Verifique que el valor "465" esté en el campo "Server TCP/IP port:".

-
En la ventana "Settings for retrieving mail (POP3)".
-
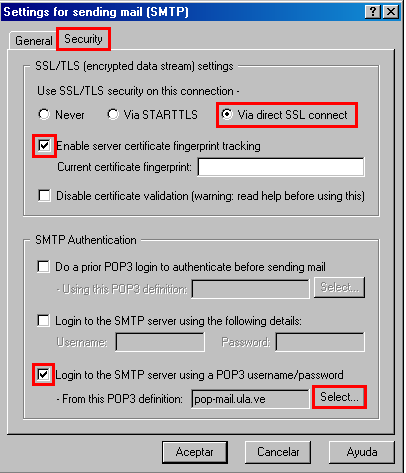
Seleccione la pestaña "Security".
-
Active la opción "Via direct SSL connect"
-
Verifique que "Enable server certificate fingerprint tracking" esté activado.
-
Verifique que "Login to the SMTP server using a POP3 username/password" esté activado.
-
Presione el botón "Select...".
-
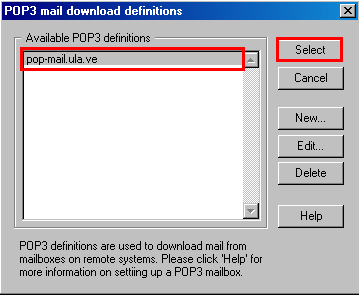
Seleccione el Nombre de la cuenta; luego "Select".
-
Presione "Aceptar".
